Image registration tutorial
This tutorial provides a brief introduction to the image registration capabilities of plastimatch. You will need an image viewing program such as 3D Slicer (http://slicer.org) to see your results.
Download the sample data
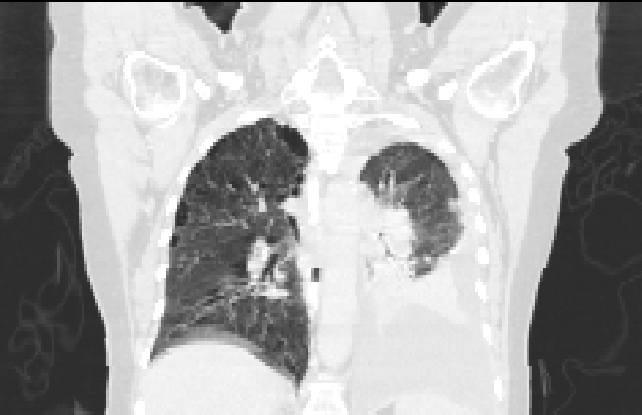
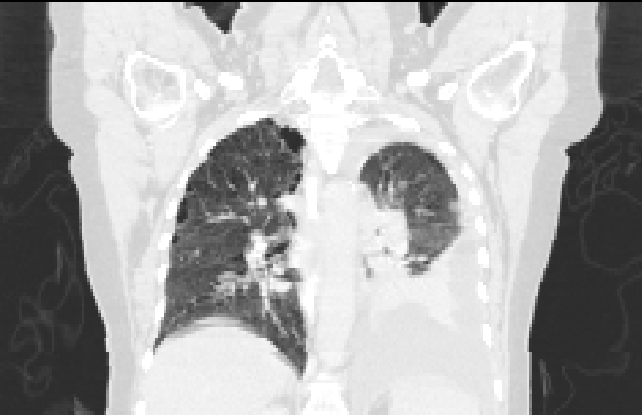
https://downloads.sourceforge.net/project/plastimatch/Sample%20Data/registration-tutorial.tar.gz/download The sample data contains two 3D volumes from a 4D CT scan of a lung cancer patient. The file t0.mha is the inhale state and the file t5.mha is at the exhale state. You can see the original images below.
Run the registration
The sample data includes a file called parms.txt, which is an example of a registration command file needed to run a registration. You can run the registration using the following command:
plastimatch register parms.txt
When you run the registration, you will see a lot of text displayed on the console. When complete, a file called warped.mha is produced.
View the command file
Next, open up the command file in a text editor. You should see the following:
[GLOBAL]
fixed=t5.mha
moving=t0.mha
image_out=warped.mha

[STAGE]
xform=bspline
The GLOBAL section is where you specify your input and output files. There should be only one GLOBAL section. The STAGE sections are where you specify what kind of registration you want. In this case, we specify only that it is a B-spline registration.
By default, a B-spline registration uses control point spacing of 20 mm. Let’s modify the registration to run in two stages: first at 50 mm, and then at 20 mm. Change the file as follows:
[GLOBAL]
fixed=t5.mha
moving=t0.mha
image_out=warped.mha

[STAGE]
xform=bspline
grid_spac=50 50 50

[STAGE]
grid_spac=20 20 20
Please note that when you re-run the registration, it overwrites the existing output file. If you also want to export the deformation vector field, modify the file again to this:
[GLOBAL]
fixed=t5.mha
moving=t0.mha
image_out=warped.mha
vf_out=deformation.nrrd

[STAGE]
xform=bspline
grid_spac=50 50 50

[STAGE]
grid_spac=20 20 20
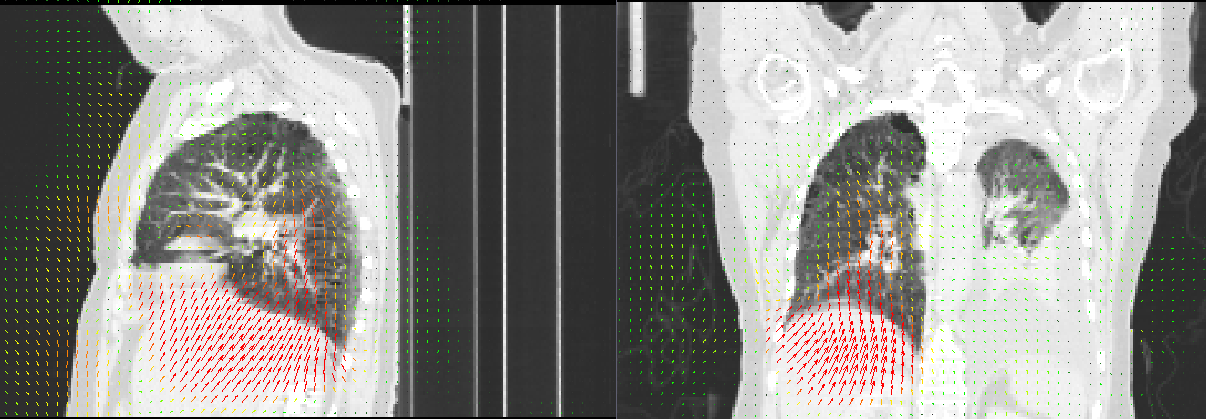
When you run again, you should find that a file named deformation.nrrd was created. You can load this file in 3D Slicer as a deformation field (choose Transform in the Description pulldown when you load). The result can be overlaid as shown below.